Creating and editing WordPress pages is intended to be simple by design. However, things are only simple when you understand some key principles.
Much of WordPress follows a similar pattern. Knowing how to edit pages of your website, gives you the fundamental principles that allow you to edit posts.
To begin editing WordPress pages, at the left black menu click on Pages. This will show a list of the pages already in existence.

To add a New Page, at the top of the screen click on the Add New link, to the right of the Pages title.

Alternatively, if you wish to edit an existing page, click on the highlighted page name.
On the new page fill in the text box below the Edit Page title with the name of your page.
Below this is the content editor for the page.
In the right hand column are additional options.
You may have other form fields further below the editor, such as SEO fields. We’ll ignore these.
Publish

At the top right corner of the page is a box labelled as Publish, which offers options related to the state of the page.
I like to click on the View Page in the top black bar, to preview the page which I am working on.
To save the page, recover a prior revision and to schedule when the page is to be made available. You can also chose to keep the page private, not for public viewing.
Saving The Page
If you are still creating your website, click on Save Draft.
Revisions
If you are unhappy with the path which your current version of the page has taken its possible to select one of the previous versions.
Click on this option will show you a timeline, with the option to click on the different revisions for comparison.
Schedule
Scheduling the publishing of a page will allow a new page to be created at your leisure and then set to appear on the day and time of your choosing.
Visibility
Pages may be created and targeted at visitors to your website who are logged in.
Or simply keep them as reminders or information for yourself.
Page Attributes
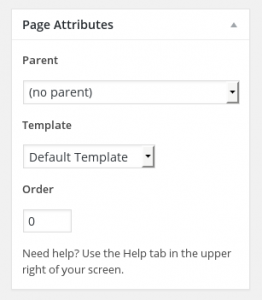
This section allows the selection of a parent page and the template to be used for the page.
The theme variation for the page may also be selected.
WordPress themes support variations on the design, called templates. Simple examples are page layouts with
- one large content area
- the widget sidebar on the left
- the widget sidebar on the right
- eCommerce specific
If your page is most suited to one of these styles, other than the default one, select it from the list.
Featured Image

The featured image may be used to provide a summary image association for the page. Its more pertinent for the posts.
I’ve also created custom templates using the featured image to allow the client to edit a large parallax image associated with the page and to show a large boxed image in the header.
Entering page content
The large box, in the centre of the page, allows content to be written, much like using a word processor
There are two rows of icons, which allow the appearance of the text to be changed. The usual formatting options are here, such as: bold; italics; headers; bullets and justification.
If you wish to originate your content on another computer and to paste it into the page, once you have finalised your version, first click on the T icon in the bottom row. Now paste in your content. This will strip the additional formatting that Word and Writer incorporate. Once done, click on the T icon once more.
When editing content I like to have another browser open so that I may view the finished product within a browser, which hasn’t got the black WordPress menu bar at the top.
Menu
Having created your web page its likely that its not appearing within the menu.
Pages are assigned to a named menu on the Appearance>Menu age.
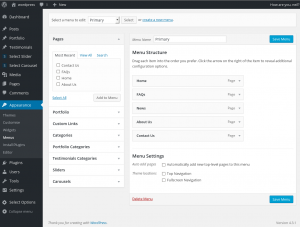
Details about Editing a WordPress Menu, adding a page and positioning it in the menu hierarchy are covered in another article.


