With a PayPal BuyNow button you can easily accept registrations for an event or sell one or two products on your website.
Create a PayPal BuyNow button for your website in a few easy steps.
To begin creating your button login to your account on the PayPal website.
Tools
Buttons are one of the tools. For a list ot available tools click on the Tools menu item and select All Tools.

Scroll down and click on the PayPal Buttons tool. At the time of writing, for me this was on the 3rd row.
The next screen shown is a summary of your saved buttons, together with a number of example buttons.

Once you have created your new button it may be saved for future reference or to replicate and amend for another purchasable item.
In my example there are no previously saved buttons, all those listed are samples.
Click on the Create new button link on the right hand side (related items).
Create a PayPal Payment Button
The next view shows the beginning of the sequence for Creating a PayPal payment button.
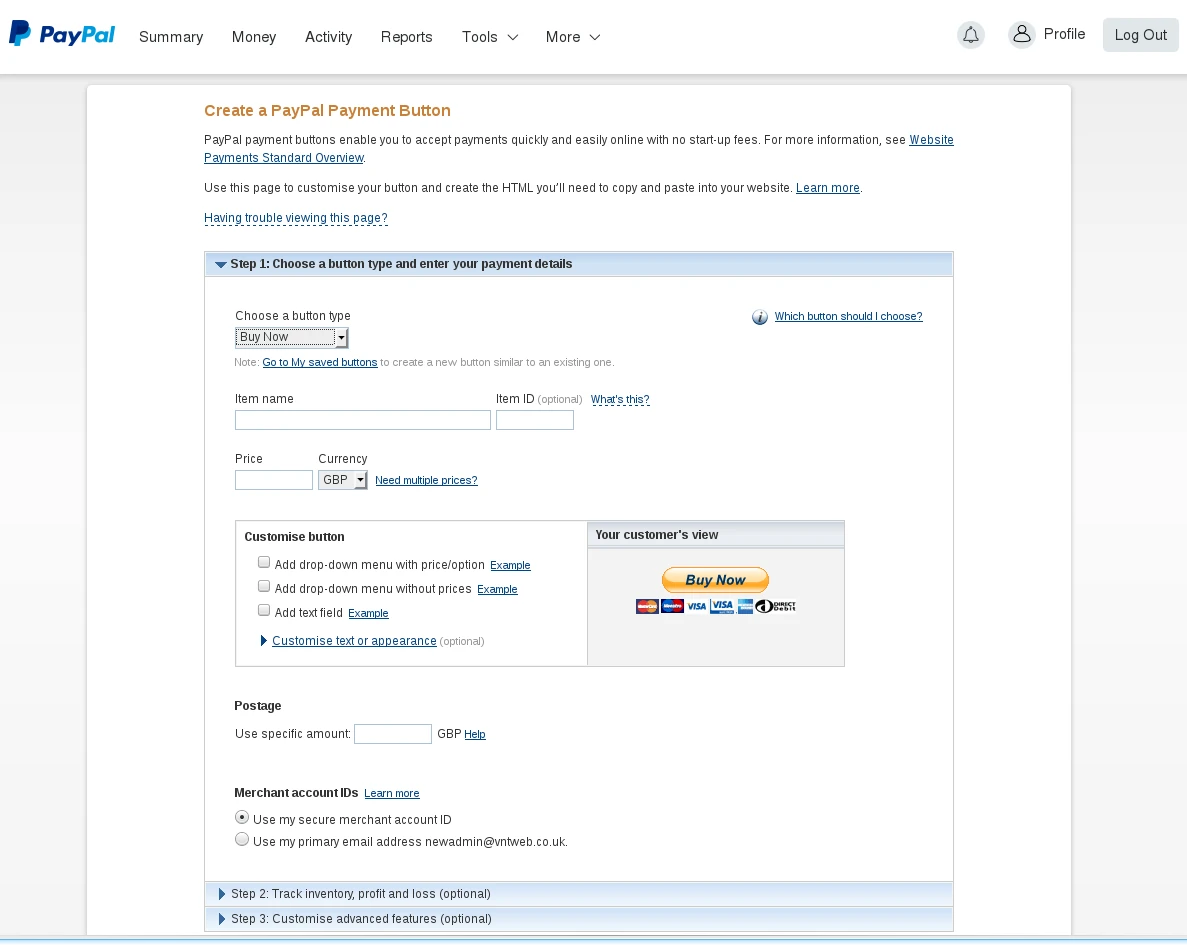
Shown is step 1 – choose a button type and enter your payment details.
A drop down list shows the different types of buttons which can be created. I chose the Buy Now button type.
Give the button a name, and optionally an ID. These two settings will make tracking and usage of the button easier to follow.

In the example above I have chosen the BuyNow button type, assigned an item name and ID, set the price.
There is no selectable quantity option. This will be covered later.
Under the Merchant Account IDs, I chose the first option secure merchant account ID. This option will hide your email address from the button code. However, it may well still be shown on the PayPal payment page.
Click on the Step 2 title bar to progress.

This step allows the button to be saved for future use. This can be useful as it enables the configuration of a previously used button to be reviewed. Also this button may be duplicated and a minor change performed to create a button for a similar product.
I chose to configure a limit on the number of products available. For a physical product you may prefer not to do so – if there is a shortage then stock can be replenished.
Click on Step 3 title bar to progress.

Step 3 offers a number of options.
You may wish to enter a link to pages on your website for the completion and cancellation of the payment process.
Click on Create Button the bottom of the page.
Add your button code to your webpage
The next page is a summary of adding the button to your website, and the code to be pasted in.

When adding the code to your website be sure to paste it in the HTML code view of the editor.
Adding a quantity option
The button creator on the PayPal website doesn’t include the option to create a quantity selection. To implement this the code for the quantity should be added.
The quantity may be included as either a textbox, allowing the website visitor to enter their own choice. Note you may bneed to add protection against the entry of non-integers.It looks something like:
<table>
<tbody>
<tr>
<td>Quantity:</td>
<td><input name="quantity" type="text" value="1" /></td>
</tr>
</tbody>
</table>
Or to control the quantity selection a drop down list may be added.
<table>
<tbody>
<tr>
<td>Quantity:</td>
<td><select name="quantity">
<option value="1">1</option>
<option value="2">3</option>
<option value="3">3</option>
<option value="4">4</option>
<option value="5">5</option>
<option value="6">6</option>
<option value="7">7</option>
<option value="8">8</option>
</select></td>
</tr>
</tbody>
</table>
Whichever of these is chosen it will require editing of the button code generated on the PayPal website.


