A quick look around the admin side of a WordPress website.
With an insight into the admin view layout and editing: pages; posts; and uploading a new image to the media library.
A WordPress website has a public view and an admin view.
I’ll use example.com as the domain name.Replace it by your website URL (domain name) it the examples below.
There is lots which can be described about the admin view of a WordPress website. But I’ll aim to keep it brief, concentrating on accessing the website with an insight into editing the core content.
Login to the WordPress website
Login to the admin view. Add /wp-admin to your domain, for example
http://www.example.com/wp-admin/
The standard WordPress login screen looks like the image below:

Add the username and password which you have been given and click on the login button.
This will take you to the WordPress dashboard view. Content on view here will depend upon features which have been added and active notifications.

So, the website has a public view (the normal site) and an admin view (the dashboard that you are seeing and from where you manage the site).

To move between the public and admin views:
- admin to public – click on the house icon in the top left hand corner
- public to admin – click on speedometer dial and select dashboard from the expanded menu
In Admin view there are two menus, one on the left and one across the top. The menu on the left hand side (black background) is your navigation and the top menu bar gives you relevant options that will change according to where you are.
Common core actions are:
- Pages – maintain the pages of the website
- Posts – can be blog posts, but a category may also be presented on a page.
- Media – add new images and documents (pdf) with appropriate descriptions
- User Account – top right corner. follow the link to change your profile details and password.
Features are added with plugins to expand the capabilities of the website. There are many to choose from, and more than the aim of this article.
Blocks
WordPress uses blocks to provide the content in pages and posts.
Editing content makes use of blocks to provide features: paragraphs & text content and images;
Blocks are added by:
- hovering between blocks on the screen to show a blue bar with centred plus sign
- pressing return after existing content to create a new empty space. Click on plus sign at row end
- Blue plus sign top left corner of the page/post editing view
Either select from the most used blocks or use the search string to find a matching one.
The plus sign in the top corner expands a panel on the left with all of the blocks presented.
Typing within the content area will create a paragraph block by default.

Blocks have their own options associated. These are configured either in the context panel on the right or in an icon popup bar above the currently active block, as shown for the paragraph block in the above image.
The first icon in the panel allows the purpose of the block to be changed to a subset of the installed block. In the image variations for heading, lists and quotes are in the list.
Context Options Panel
On the right of the page is a tabbed content sensitive settings panel. The main tab provides options relevant to the activity, for example page or post. The second tab will show the options for the current block being edited, for example.
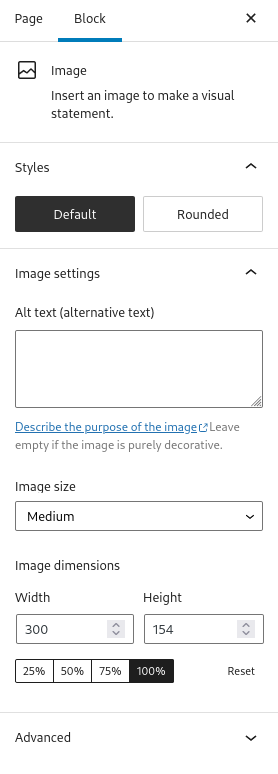
Shown in the image above is the tab for the additional options associated with an image block. Options presented are dependant upon the block selected.
Pages
Click on the Pages entry on left hand black menu to see a list of all pages. Filter and sort as desired.
Addition of a new page and editing of existing has similar interface.
Blocks are added in the main content area with page options to the right.
At the top of the screen on the right are options to save draft and publish.
In the page options you can set when a page can be published. Either immediately or at a date and time in the future. You won’t need to be around to publish your page at 2 O’Clock in the morning.
Set a page as private to use it as info and reminder of how to do...
Other options include:
- page parent – to set sub-pages. Deeper than a single parent-child can be awkward to use in a menu. Keep it simple.
- page template – custom layouts governing the layout of the page
- revisions – made a mistake and wish to back track?
An SEO plugin will add options at the bottom. Complete these providing information for these textbox entries.
Menus
If you wish to change the pages shown in the menu the options for this are shown under appearance on the left menu
After creating and publishing your page you can add it to the main menu. don’t worry about including every page in the menu. Just ensure that it can be found, be that by a link on one or more pages on the site, or as a dedicated landing page from an email or event.
Shown below is a typical menu.
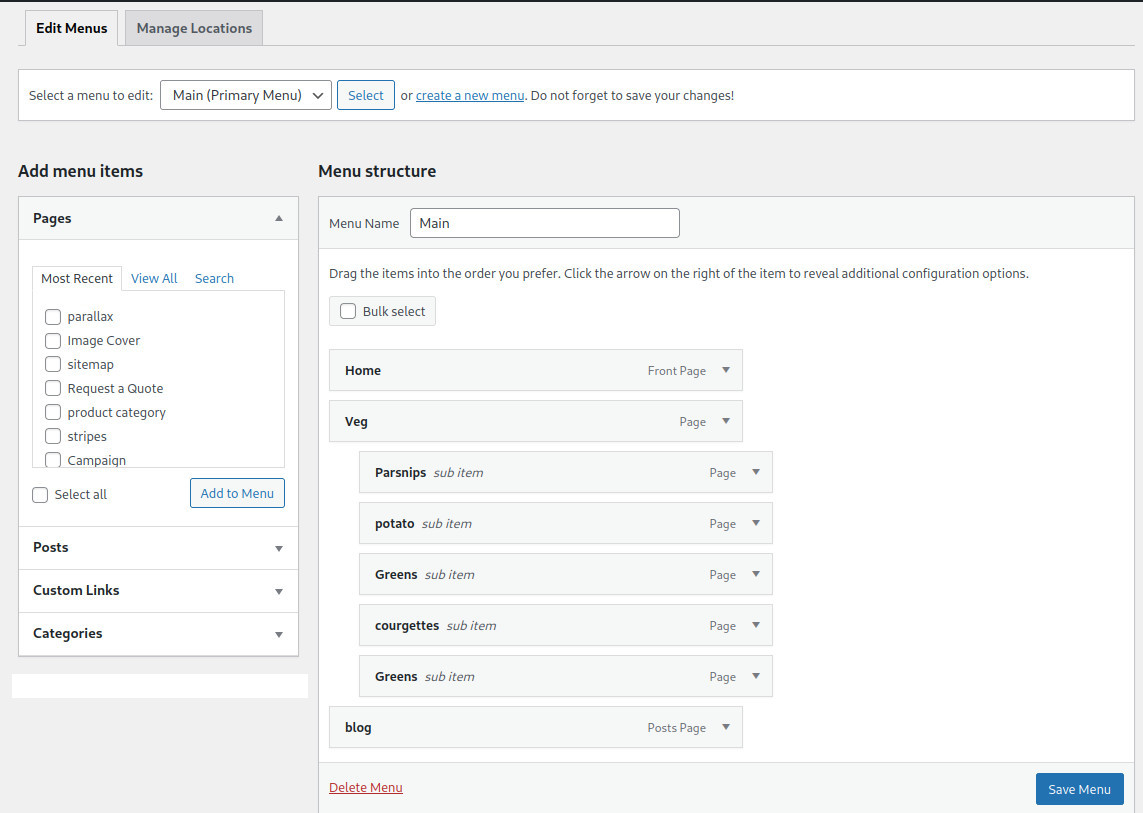
On the left are shown the possible published pages and a number of special menu entry types. The main part of the window shows the menu structure. Pages can be dragged to create the menu structure you wish.
I prefer to match the menu structure to the parent-child relationship created with the pages.
Posts
The administration of posts look similar to pages.
Posts can be grouped by category. For example when filtering the output of the blog page. Or a particular category can be listed on a page, maybe to illustrate recent projects.
Tags can be used to provide further filtering. But this goes across categories. For example an historic building could be a shop, a castle and an hotel.
The featured image and excerpt text may be used when showing the list of posts.
Again there is likely content to be added for SEO.
Media
The media library is accessed on the left hand black menu.
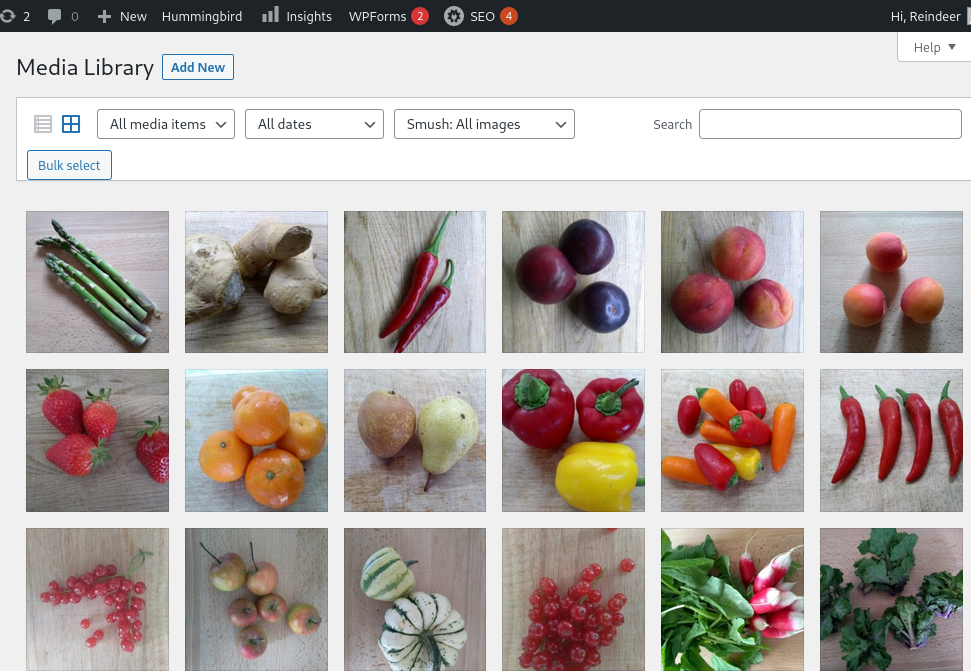
Uploaded images are shown as a grid of thumbnails.

Click on the add new button at the top of the screen to upload a new image from your local computer. Images can be dragged from the folder across into the screen, as in the image above, or by a traditional style navigation of folders from the browser.
Its good to name an image to reflect the page and usage on the page, all lower case with dashes not spaces. For example the image below is named wordpress-quick-orientation-media-library-image-metadata.png.

Click on one of the uploaded images to set the meta data text. This is important for SEO and for use by screen readers.
Other Thoughts
When first visiting the admin view of a website to edit a post or page the layout may be “wrong”.
Ideally you want the navigation bars on the left and at the top to always be there so that you can easily navigate. If by chance they are not there then it mean WordPress has gone into Full screen mode. In that case press (together) to toggle back to “non full screen” view. There is another way to do this toggle – at the top right corner click on the 3 vertical dots and ensure fullscreen mode is unticked.
a further issue can be the disappearance of the right hand options pane. If this is missing click on the gear symbol a little to the left of the dots .
Editing existing content – it can be easier to navigate the public view of the website and then click on either edit page or edit post at the top horizontal black menu panel.
Don’t forget to save frequently, make use of the preview/view in another browser tab or browser altogether, to ensure it looks right, and revisions are there if you need to backtrack on your edits.


